A few weeks ago I received an invitation on LinkedIn from a D365 Consultant from Nigeria. He wanted to thank me for blogging about the post on my blog explaining how to use different NAV/BC cumulative updates in the same machine.
Later he ask me to blog about ServiceTierAdministrator.
ServiceTierAdminstrator is a great tool that allows you to manage multiple NAV/BC instances/versions but the interface can be clumsy and not easy to understand how to setup new instances.
So I’m writing this article to give you a better overview on how use the app to have multiple NAV/BC instances.
Scenario 1 – I already have a service up and running and I want to create a new instance for that service to connect to a different database
I already have a service instance for BC 14 Cumulative Update 4 called bc-w1-14-update-4 and I want to create a new service instance to connect to a different database.
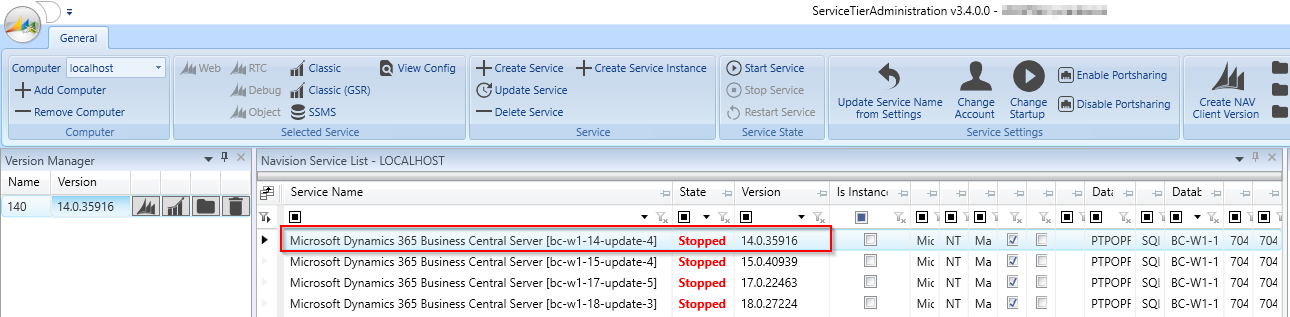
You just need to select an existing service (I’ve selected the bc-w1-14-update-4 service), click on Create Service Instance, name the new service instance and press OK.
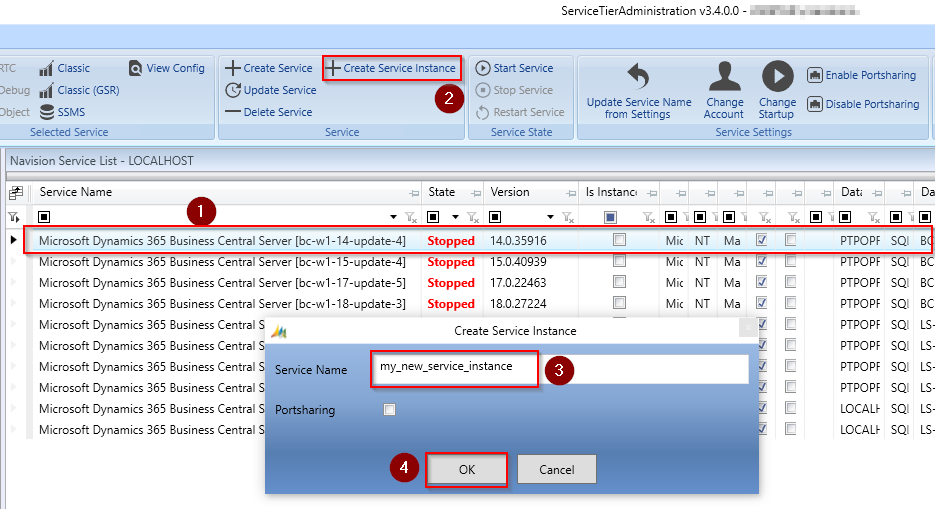
NOTE: Don’t tick the Portsharing for now. I’ll get explain it later how to use it.
The new service instance is now created. Easy, right?
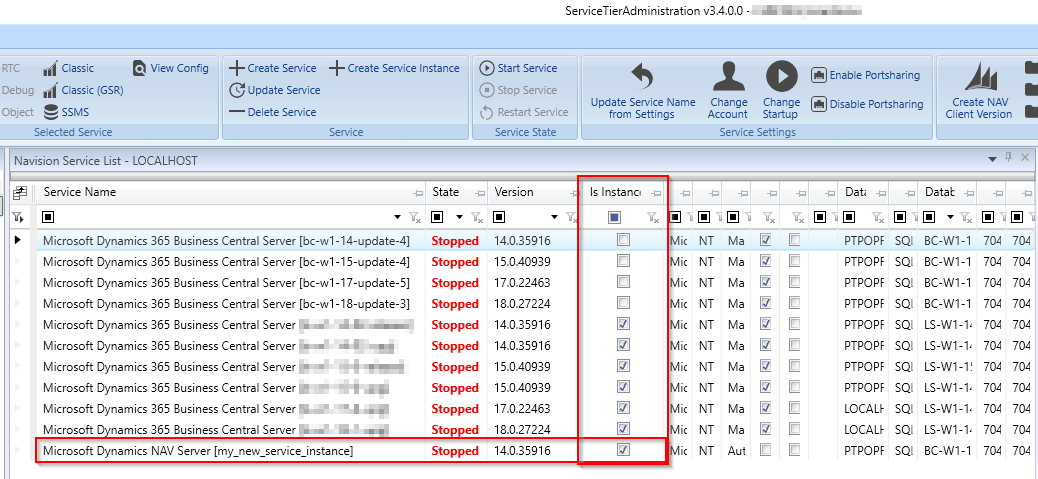
Also note the Is Instance column that helps you identifying if this is an instance of the service or if it is the main service.
After creating the instance, you need to change some properties like the database name and the ports, if you’re not using port sharing and you want to have more than one service running simultaneously.
You can do it on the side panel, after selecting the newly created service.
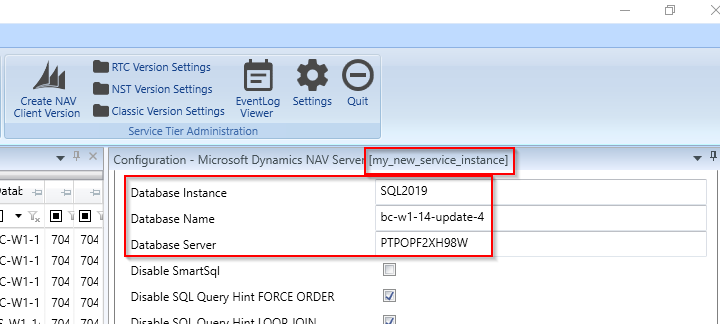
The setting to update the Database Name
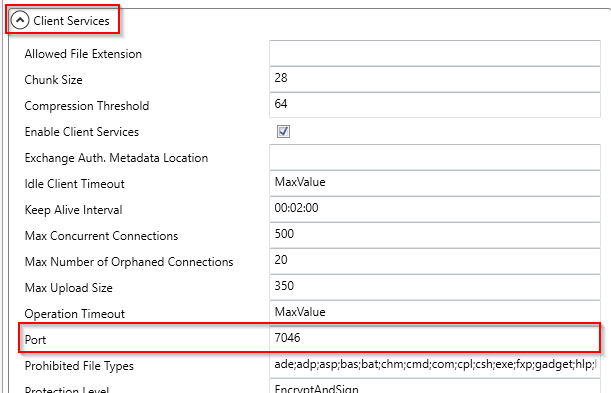
The setting to update the Client Port
Don’t forget to update the other ports, if needed.
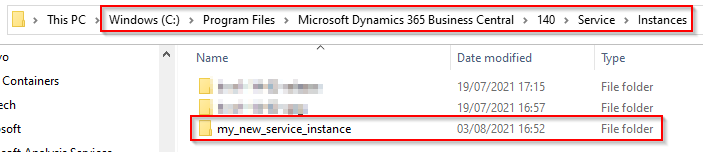
If you take a look on the Business Central Service folder, on Program Files, you will notice that there’s a new folder named Instances:
C:\Program Files\Microsoft Dynamics 365 Business Central\140\Service\Instances

Scenario 2 – Creating a new service for a different NAV/BC minor version
Please note that if you don’t have any service created for a specific major version, the best option is to install NAV/BC from the installation files.
I have a service for BC CU 4 but now I want to create a new service for CU 25, for example.
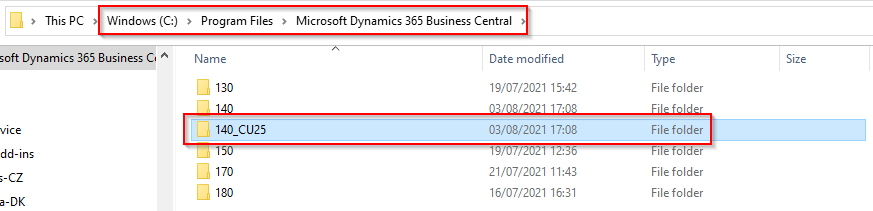
First I need to copy the Service folder from the Business Central installation DVD to the Program Files folder.

Rename it from 140 to 140_CU25 and copy to C:\Program Files\Microsoft Dynamics 365 Business Central\
Next let’s setup this folder on ServiceTierAdministrator.
Click on NST Version Settings, Add and select the Microsoft.Dynamics.Nav.Server.exe file on the newly copied folder.
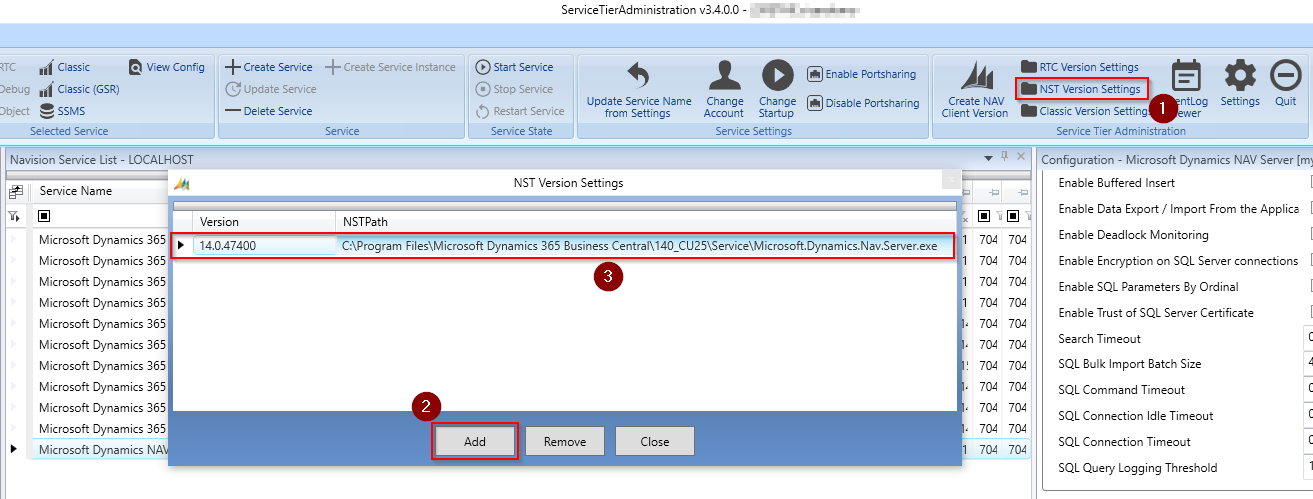
Click on Close.
This step is needed so that you’re able to create a new Service for this specific BC version.
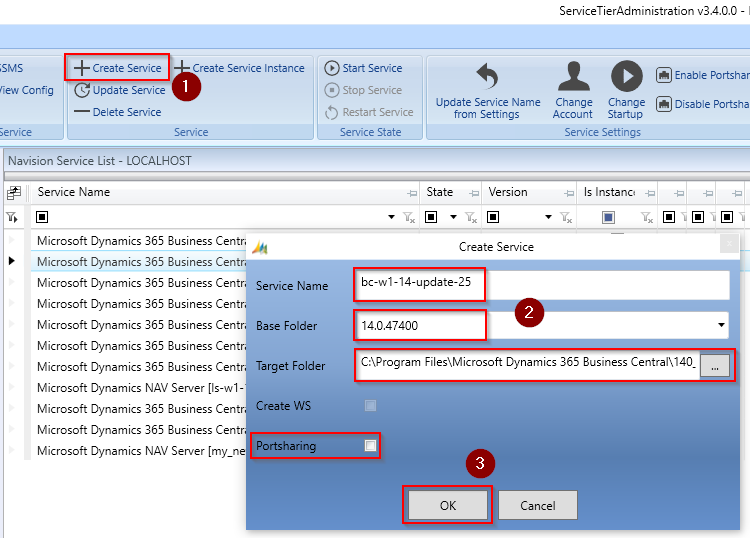
To create a new Service:
- Click on Create Service
- Name the Service (for example, bc-w1-14-update-25)
- Enter the Base Folder that it’s basically the BC version you want to use to create the service
- NOTE: If you miss the earlier step of adding the Microsoft.Dynamics.Nav.Server.exe file to the NST Version Settings, you won’t have it here.
- Create a new folder named Instances inside the Service folder (example: C:\Program Files\Microsoft Dynamics 365 Business Central\140_CU25\Service\Instances)
- Enter the Target Folder. Point to the newly created Instances folder (C:\Program Files\Microsoft Dynamics 365 Business Central\140_CU25\Service\Instances)
- Untick the Portsharing box for now.
- Press OK
A new folder is created inside the Instances folder, with the newly created service name:
C:\Program Files\Microsoft Dynamics 365 Business Central\140_CU25\Service\Instances\bc-w1-14-update-25
If you look you will notice that ServiceTierAdministrator copied the content of folder C:\Program Files\Microsoft Dynamics 365 Business Central\140_CU25\Service to C:\Program Files\Microsoft Dynamics 365 Business Central\140_CU25\Service\Instances\bc-w1-14-update-25, so all those files are now duplicated. Unfortunately I couldn’t find a way to avoid that.
The good news is that, if now you create a new Service Instance for this version, like I did on scenario 1’ve shown you in the beginning of the article, ServiceTierAdministrator only creates a folder inside the Instances folder with only two files, although this Instances folder is created inside the bc-w1-14-update-25 folder.
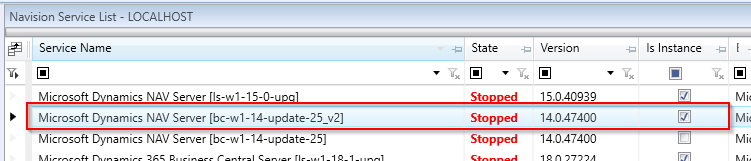
I’ve created a new Service Instance called bc-w1-14-update-25_v2:

NOTE
If you’re having troubles running the newly created service due to database permissions, please note that when a service is created using ServiceTierAdministrator, by default the service runs under the Network Service account which may not have permissions to access the database. In Event Viewer you’ll see the following warning when starting the service:

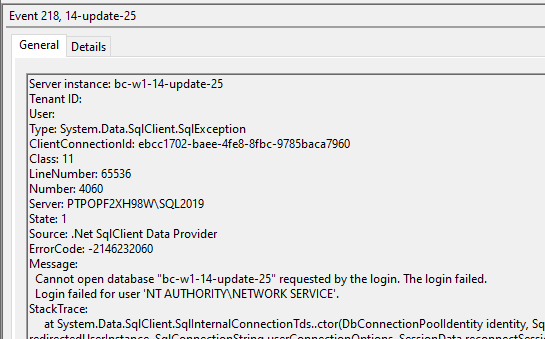
To fix it, you can give db_owner database permissions to Network Service, by running the following SQL query:
USE [<database name>]
CREATE USER [NT AUTHORITY\NETWORK SERVICE] FOR LOGIN [NT AUTHORITY\NETWORK SERVICE] WITH DEFAULT_SCHEMA=[dbo]
EXEC sp_addrolemember N’db_owner’, N’NT AUTHORITY\NETWORK SERVICE’
Port Sharing
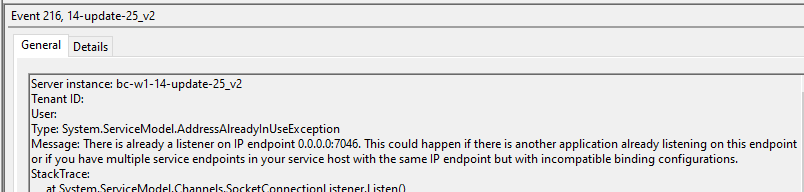
If you try to run the two services simultaneously, without changing the services ports (Client, Management, Developer, Soap, Odata and so on), you will get an error in Event Viewer.

As you can see, I’m still using the standard ports for the newly created services.

On a production environment, it is a best practice to have different ports for each service. But on a development environment, where we might have several services, maintaining different ports for each service can be tedious.
Port Sharing to the rescue.
You can activate Port Sharing which allows you do use the same ports across different services. That way, the Client port can be the default 7046 on every NAV/BC Service, the Management port can be the default 7045 on every NAV/BC Service, and so on.
Please note that the Client Services port must be different than the Management Services port and other services like Odata, Soap, etc.
Well, how do you activate the Port Sharing?
On ServiceTierAdministrator, you need to select the NAV/BC service and press Enable Portsharing.
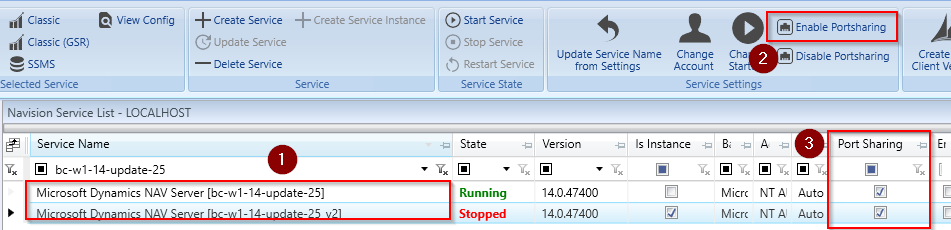
But that’s not all. If it’s the first time you’re setting up and using Port Sharing, there’s an additional step that needs to be done. You need to start and set the Net.Tcp Port Sharing Service to run automatically.

Now you just need to start (or restart) the NAV/BC services and voilá, both services should be up and running on the same ports.

I hope you enjoyed this article and found it useful.
Please feel free to comment on this.
Regarding scenario 2, no need to copy that folder to c:\program files. You can also extract the downloaded zip file from microsoft in a shared server folder. Then in the NST Version Settings, you add for example
\\host\Software\Navision\Business Central 140\14.0.47286\ServiceTier\program files\Microsoft Dynamics NAV\140\Service
For the service tier this is working good. But it seems not possible to do the same for the BC RTC client in a 3 tier env. (Lower versions <130 seems to be working fine) Or i am doing something wrong 😉
Hi Jan,
Thank you for your comment.
You are correct. It is not mandatory to copy to the Program Files folder. But I suggested to do it that way to have all instances organized in the same folder. But it’s great to know that it also works fine if you have it on a shared folder. On some scenarios it might be interesting to have the BC service running from a shared folder.
I’m not sure why it is not working on older versions but I don’t feel like I would need/want to run it from a shared folder (instead of the Program Files folder – or any other local folder).